Aprender sobre DNS en videotutorial

Videotutorial en ingles, sobre DNS (domain name sistem), a modo de introduccion se explica que son las dns, como se resuelven los nombres dominios, y como se instala, configura y se utiliza en distintas plataformas (windows, linux, solaris)
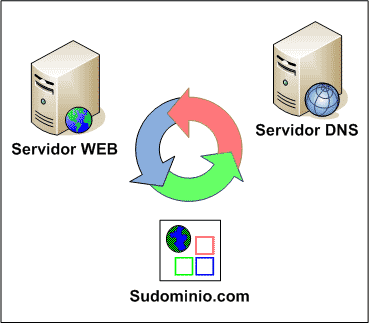
Contenido:

01 Welcome
0101 Welcome
0102 Introduction

02 An Introduction to DNS
0201 What is DNS?
0202 What is DNS Used for?

03 How Does DNS Work?
0301 The DNS Namespace
0302 The DNS Request Process

04 Configuring DNS Clients
0401 Collecting The Required DNS Settings
0402 Configuring Microsoft Windows DNS Clients
0403 Configuring Unix DNS Clients

05 Using DNS Clients
0501 The Available DNS Clients
0502 Using NSLOOKUP in Interactive Mode
0503 Using NSLOOKUP in Batch Mode
0504 Using DIG in Unix
0505 WHOIS

06 About Zones and Records
0601 What are Zones?
0602 What are Records?
0603 Exploring the Various Record Types

07 DNS Server Architecture
0701 Planning Your DNS Server

08 Microsoft Windows DNS Servers
0801 Installing the MS Windows DNS Server
0802 Configuring the MS Windows DNS Server
0803 Creating/Configuring a Primary Forward Zone
0804 Creating Other Types of Zones
0805 Configuring Records
0806 Configuring Sub Domains

09 Unix DNS Servers
0901 What DNS Servers are Available for Unix?
0902 Installing BIND 9 from Binary Distribution pt. 1
0903 Installing BIND 9 from Binary Distribution pt. 2
0904 Installing BIND 9 from Source Code
0905 Configuring BIND 9 Options pt. 1
0906 Configuring BIND 9 Options pt. 2
0907 Configuring BIND Zones pt. 1
0908 Configuring BIND Zones pt. 2
0909 Configuring BIND Records pt. 1
0910 Configuring BIND Records pt. 2
0911 Configuring Subdomains in BIND
0912 Configuring using RNDC pt. 1
0913 Configuring using RNDC pt. 2

10 Advanced Windows DNS Features
1001 Configuring Dynamic DNS in Windows
1002 Configuring Record Scavenging in Windows
1003 Configuring Round Robin DNS in Windows
1004 Configuring NOTIFY in Windows
1005 Configuring WINS Integration in Windows

11 DNS And Active Directory in Windows
1101 Active Directory and DNS Working Together
1102 Active Directory DNS Configuration

12 Advanced BIND Features
1201 Configuring Dynamic DNS in BIND
1202 Configuring Round Robin DNS in BIND
1203 Configuring NOTIFY in BIND
1204 Configuring Internal BIND Server for Split DNS
1205 Configuring External BIND Server for Split DNS
1206 Alternate BIND Logging

13 DNS Security
1301 Potential DNS Security Problems
1302 Restricting Zone Transfers and Interfaces
1303 Setting Zone ACLs in Windows
1304 Dynamic DNS Security/Cache Pollution
1305 BIND TSIG Keys and Encryption
1306 Restricting BIND Zone Transfers/Interfaces
1307 Jailing BIND

14 Troubleshooting
1401 Troubleshooting a Microsoft DNS Server
1402 Troubleshooting a BIND Server

15 The Windows DNSCMD Utility
1501 Installing DNSCMD and an Introduction pt. 1
1502 Installing DNSCMD and an Introduction pt. 2
1503 DNSCMD Features pt. 1
1504 DNSCMD Features pt. 2

16 Third-Party DNS Tools
1601 Installing and Configuring Webmin
1602 Using Webmin pt. 1
1603 Using Webmin pt. 2
1604 Installing/Configuring Men and Mice QuickDNS
1605 Using Men and Mice QuickDNS
1606 Installing Incognito DNS Commander
1607 Using Incognito DNS Commander

Descargar:

http://rapidshare.com/files/146097975/DNS-videotutorial.rar

Curso con videotutorial de Ubuntu Linux

Contenido del videotutorial del curso de Ubuntu:

Introduction
About this course (04:16)
About Linux & Free Software (05:02)
About Ubuntu Linux (03:51)
Where to Go for Help (05:53)
Ubuntu Linux
How to Obtain Ubuntu Linux (05:38)
Downloading Ubuntu Linux Live CD (03:03)
Checking MD5 Sum & Burning to CDRom (05:05)
Booting LiveCD
Initial Boot Menu (03:12)
Default Desktop Environment – GNOME (02:50)
Examples Folder (03:58)
Preinstallation Steps (04:22)
Install LiveCD Pt.1 (04:47)
Install LiveCD Pt.2 (02:00)
Booting Ubuntu Linux & The GNOME Desktop
Initial Boot & Login Screen (03:38)
Exploring the GNOME Desktop (05:58)
Virtual Desktops (03:29)
Nautilus File Manager
File Manager Basics (04:11)
The Home Directory (06:14)
Emblems, Right Click Menus, Drag & Drop (03:57)
Nautilus Special Locations (04:59)
Linux Filesystem Hierarchy Pt.1 (05:03)
Linux Filesystem Hierarchy Pt.2 (04:47)
Drives, Case Sensitivity, & Permissions (07:11)
Customization
Changing the Background (06:21)
Changing Themes, Adding New Elements (06:15)
Creating Your Own Theme Pt.1 (04:47)
Creating Your Own Theme Pt.2 (04:14)
Customizing Panels & Applets (03:30)
Changing Font Preferences (04:18)
Menu Detail
Applications Menu (07:23)
Places Menu Pt.1 (04:03)
Places Menu Pt.2 (03:58)
System Menu (06:15)
Configuration Tools
System/Preferences Menu Pt.1 (06:03)
System/Preferences Menu Pt.2 (03:05)
System/Preferences Menu Pt.3 (03:05)
System/Preferences Menu Pt.4 (04:34)
System/Preferences Menu Pt.5 (04:23)
System/Administration Menu Pt.1 (06:55)
System/Administration Menu Pt.2 (07:21)
Mutimedia Applications
Legal Issues (05:24)
Audio Applications (06:45)
Video, Photo, & Image Editing Applications (06:05)
Productivity Applications
OpenOffice.org Overview (05:12)
OpenOffice.org Writer & Calc Pt.1 (04:13)
OpenOffice.org Writer & Calc Pt.2 (04:22)
OpenOffice.org Base & Impress (06:13)
Evolution (06:21)
Adding New Software
Add/Remove Software Application (05:47)
Software Sources (06:02)
Synaptic Package Manager (06:17)
Easy Ubuntu & Automatix (07:27)
Introduction to the Terminal
Gnome Terminal Application (05:05)
Basic Commands Pt.1 (05:54)
Basic Commands Pt.2 (05:30)
Applications, System Logs & Apt-Get Pt.1 (04:03)
Applications, System Logs & Apt-Get Pt.2 (06:20)
Using Text Editors Pt.1 (05:13)
Using Text Editors Pt.2 (02:56)
Windows Applications in Linux
WINE Project (07:23)
Crossover Office & Cedega (05:09)
Conclusion
Concluding Thoughts (01:49)
Credits
About the Author (02:24)

Descargar:

http://rapidshare.com/files/109366937/vtcubuntu.part1.rar
http://rapidshare.com/files/109367811/vtcubuntu.part2.rar
http://rapidshare.com/files/109362509/vtcubuntu.part3.rar

Curso Servidores Ubuntu. Instalación de un Servidor Email

VideoTutorial del Curso Ubuntu Servidores. Instalación de un Server Mail. Introducción a los Servidores Mail: MTA, MDA, MUA; Agentes para la transferencia de Mails; Instalar Postfix y Paquetes asociados: clamav, mailx, mailscanner, postfix, postfix-docs, postgrey y qpopper. Modelos de Configuración de Postfix; Instalación desde la línea de comandos. Envío de nuestro primer mail con mailx y con Thunderbird.

Descargar:

http://rapidshare.com/files/163751407/ubuntu_servidores002.rar

La biblia del servidor Apache

El servidor HTTP Apache es un software (libre) servidor HTTP de código abierto para plataformas Unix (BSD, GNU/Linux, etc.), Windows, Macintosh y otras, que implementa el protocolo HTTP/1.1 [1] y la noción de sitio virtual. Cuando comenzó su desarrollo en 1995 se basó inicialmente en código del popular NCSA HTTPd 1.3, pero más tarde fue reescrito por completo. Su nombre se debe a que Behelendorf eligió ese nombre porque quería que tuviese la connotación de algo que es firme y enérgico pero no agresivo, y la tribu Apache fue la última en rendirse al que pronto se convertiría en gobierno de EEUU, y en esos momentos la preocupación de su grupo era que llegasen las empresas y “civilizasen” el paisaje que habían creado los primeros ingenieros de internet. Además Apache consistía solamente en un conjunto de parches a aplicar al servidor de NCSA. Era, en inglés, a patchy server (un servidor “emparchado”).

Descargar:
http://rapidshare.com/files/74510947/LBServ_Ap2.rar

Password: www.ivlabs.org

apache

Instalar XCache en CentOS 5

Breves instrucciones para compilar y instalar Xcache en Centos 5. No tiene mayor dificultad.

# wget http://xcache.lighttpd.net/pub/Releases/1.2.2/xcache-1.2.2.tar.gz
# tar -zxf xcache-1.2.2.tar.gz
# cd xcache
# phpize
# ./configure –enable-xcache
# make
# su
# make install

Instala las extesiones compartidas de php : /usr/lib/php/modules

# cat xcache.ini >> /etc/php.ini

Editamos php.ini para instalar Xcache como extension

# joe /etc/php.ini

zend_extension = /usr/lib/php/modules/xcache.so

La configuración del xcache está explicada en comentarios en el propio php.ini, pero hay cosas relevantes como el xcache.count, relativo al número de procesadores de nuestro sistema. Averiguamos el número de procesadores y luego editamos el php.ini

# cat /proc/cpuinfo |grep -c processor
xcache.count = 4

Las demás variables se pueden configurar fácilmente leyendo la documentación. Ahora podemos crear un archivo php con la función phpinfo ( ) y moverlo a nuestro directorio root para comprobar que Xcache funciona correctamente. No olvidemos reiniciar Apache!

# /etc/init.d/httpd restart

Instalar el Admin

Para instalar el admin primero creamos un fichero php como el siguiente para obtener el password encriptado en md5

echo md5("password");

Copiamos el resultado en php.ini, en la variable xcache.admin.pass

xcache.admin.pass = "password_en_md5"

Ahora copiamos el directorio web de Xcache a nuestro document root de apache


# cp -R admin/* /var/www/midominio.com/admin/.

Reiniciamos Apache. Accedemos al admin, introduciendo user y password.

Sobre el Error Segmentation Fault

Algo que me sucedió en la instalación de Xcache en Centos 5. Al comprobar los logs de Apache comprobé que había numerosos errores de Segmentation Fault.

# php -v
Segmentation fault

# cat /var/log/httpd/error_log
[Thu Oct 02 13:43:39 2008] [notice] child pid 15978 exit signal Segmentation fault (11)
[Thu Oct 02 13:43:42 2008] [notice] child pid 15979 exit signal Segmentation fault (11)
[Thu Oct 02 13:43:50 2008] [notice] child pid 15980 exit signal Segmentation fault (11)
[Thu Oct 02 13:44:08 2008] [notice] child pid 15981 exit signal Segmentation fault (11)
[Thu Oct 02 13:44:12 2008] [notice] child pid 15982 exit signal Segmentation fault (11)
[Thu Oct 02 13:44:33 2008] [notice] child pid 15983 exit signal Segmentation fault (11)

Para evitarlo hacemos lo siguiente


# rm /dev/zero
# mknod /dev/zero char 1 5
# /etc/init.d/httpd restart

Otro problema relativo. Aunque creemos el fichero /dev/zero, por una limitación (no se si de php.ini o el propio kernel) puede que el valor de cache que asignamos a xcache.size es superior a lo que puede guardar y eso provoca el siguiente error:

xcache /dev/zero: No space left on device

Para arreglar, hemos de reducir el valor asignado a xcache.size, por ejemplo empezando por 8M y reiniciando apache. No deberíamos ver más ese error ni Segmentation Faults en el apache. Y si los hay, deberían ser por otro motivo que no fuera Xcache.